Learn a step-by-step process for adding Cisco IOU IOL images to Eve-NG. Cisco IOU/IOL images are vital tools for practicing with Layer 2 and Layer 3 devices, replicating the features and functions of original Cisco devices. Initially released for architecture and testing purposes, these images are now extensively used for CCIE Routing and Switching practice. Eve-NG is an excellent emulator to practice with Cisco devices, enabling users to import images and access them via a graphical user interface. This guide will walk you through the process of adding Cisco IOU/IOL images to Eve-NG.
Eve-ng is one of the best emulators to Practice with Cisco devices where you can import the images in Eve-ng and access it via GUI. You can set up your lab and practice as much as you want.
Table of Contents
- Supported Cisco IOU/IOL Images for Eve-NG
- Downloading Cisco IOU/IOL Images for Eve-NG
- Adding Cisco IOU/IOL Images to Eve-NG
- Licensing Cisco IOU/IOL Images
- Testing Cisco IOU/IOL Images
- Useful Links for Additional Resources
List of Images supported in Eve-ng.
Supported Cisco IOU/IOL Images for Eve-ng
Basically, Eve-ng supports all the Cisco IOU and IOL images but below are recommended ones.
| Type | EVE Image Name | Version | vRAM |
|---|---|---|---|
L2 | L2-ADVENTERPRISEK9-M-15.1-20130726.bin | I86BI_LINUXL2-ADVENTERPRISEK9-M 15.1(20130726:213425) | 192 |
L3 | L3-ADVENTERPRISEK9_IVS-M-15.3-0.9T.bin | I86BI_LINUX-ADVENTERPRISEK9_IVS-M 15.3(0.9)T | 128 |
Download Cisco IOU/IOL Images for Eve-ng
Images provided below are strictly for educational purposes and are not hosted on the networkhunt.com server. We are just indexing the links found on the internet for educational purposes only.
You can download Cisco IOU/IOL images from the links below.
Add Cisco IOU/IOL images to Eve-ng
IOL or IOS On Linux also called IOU or IOS On Unix. IOL is a simulator available for Cisco internal use only. IOL refers to the Linux version, compiled for i386 architecture. IOU refers to the Unix (Solaris) version compiled for Sparc architecture. The term IOU usually refers to IOL too.
Because IOL is an internal IOS version, IOL can be used by Cisco employees or by authorized customers only.
Upload the downloaded image to the EVE using for example FileZilla or WinSCP to: /opt/unetlab/addons/iol/bin
Type the following command to fix permissions:
/opt/unetlab/wrappers/unl_wrapper -a fixpermissions
License for Cisco IOU/IOL images.
Creating IOU and IOL licenses in EVE-NG is essential for running Cisco IOS images. This process involves generating a license key specific to your EVE-NG machine. You will need to access the EVE-NG server, run a script to generate the license key, and then input this key into the appropriate configuration file. This ensures your Cisco IOU/IOL images operate correctly within the EVE-NG environment.
#! /usr/bin/python
print("*********************************************************************")
print("Cisco IOU License Generator - Kal 2011, python port of 2006 C version")
print("Modified to work with python3 by c_d 2014")
import os
import socket
import hashlib
import struct

# get the host id and host name to calculate the hostkey
hostid=os.popen("hostid").read().strip()
hostname = socket.gethostname()
ioukey=int(hostid,16)
for x in hostname:
 ioukey = ioukey + ord(x)
print("hostid=" + hostid +", hostname="+ hostname + ", ioukey=" + hex(ioukey)[2:])

# create the license using md5sum
iouPad1 = b'\x4B\x58\x21\x81\x56\x7B\x0D\xF3\x21\x43\x9B\x7E\xAC\x1D\xE6\x8A'
iouPad2 = b'\x80' + 39*b'\0'
md5input=iouPad1 + iouPad2 + struct.pack('!i', ioukey) + iouPad1
iouLicense=hashlib.md5(md5input).hexdigest()[:16]

print("\nAdd the following text to ~/.iourc:")
print("[license]\n" + hostname + " = " + iouLicense + ";\n")
print("You can disable the phone home feature with something like:")
print(" echo '127.0.0.127 xml.cisco.com' >> /etc/hosts\n")
1. Copy the above text create a text file and save as with the name IOUkeygen.py
2. After creating the license python script, upload it to the Eve-ng directory
-/opt/unetlab/addons/iol/bin/3. After uploading the script go to the directory by using the below command-
cd /opt/unetlab/addons/iol/bin/4. Check the directory content by using the below command-
ls -l5. you will be able to see a file with the name – IOUkeygen.py
6. Now run the Python script by using the below command-
python2 IOUkeygen.py7. It will give you some like the below output
root@eve-ng:/opt/unetlab/addons/iol/bin# python2 ioukeygen.pyAfter running the script, it will look like the below example.
Cisco IOU License Generator - Kal 2011, python port of 2006 C version
Modified to work with python3 by c_d 2014
hostid=007f0101, hostname=eve-ng, ioukey=7f0343
Add the following text to ~/.iourc:

[license]
eve-ng = 972f30267ef51616;
8. Now, we will create licenses for IOU/IOL images, to create a license key run the below command. It will create a file with the name iourc which IOU/IOL images will use for license verification.
nano - c iourc9. Paste the license and press ctrl+x to save the file.
[license]
eve-ng = 972f30267ef51616;
We have successfully added the Cisco IOU/IOL images with the license.
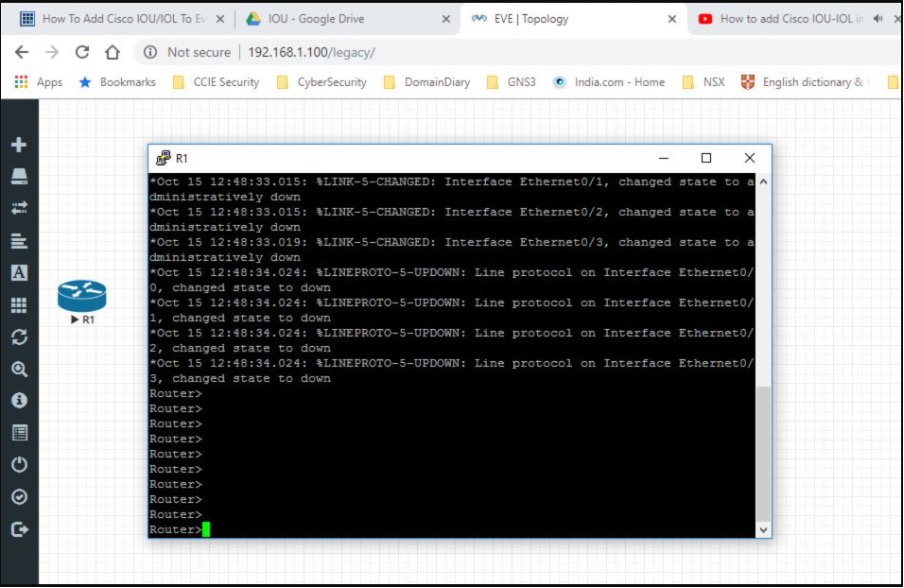
Testing Cisco IOU/IOL images
To add IOU/IOL nodes in EVE-NG via the GUI, follow these steps:
- Open EVE-NG: Launch the EVE-NG web interface in your browser.
- Create a New Lab: Click on “Lab” from the top menu and select “New Lab.” Fill in the lab details and click “Save.”
- Add a Node: Click on the “Add an Object” button (plus icon) on the toolbar and select “Node.”
- Select IOU/IOL: In the “Node” window, choose “Cisco IOU/IOL” from the list of node types.
- Configure Node: Set the desired node name, image, and other parameters. Click “Save.”
- Repeat: Add additional IOU/IOL nodes as needed by repeating steps 3-5.
- Connect Nodes: Use the “Add a Link” button to connect the nodes as required.
- Start Nodes: Click the “Start” button to power on all the nodes.
Your IOU/IOL nodes are now added and ready for use in your EVE-NG lab.
cd /opt/unetlab/addons/iol/bin
touch NETMAP
LD_LIBRARY_PATH=/opt/unetlab/addons/iol/lib /opt/unetlab/addons/iol/bin/<iosname.bin> 1
***************************************************************
IOS On Unix - Cisco Systems confidential, internal use only
Under no circumstances is this software to be provided to any
non Cisco staff or customers.  To do so is likely to result
in disciplinary action. Please refer to the IOU Usage policy at
wwwin-iou.cisco.com for more information.
***************************************************************

              Restricted Rights Legend

Use, duplication, or disclosure by the Government is
subject to restrictions as set forth in subparagraph
(c) of the Commercial Computer Software - Restricted
Rights clause at FAR sec. 52.227-19 and subparagraph
(c) (1) (ii) of the Rights in Technical Data and Computer
Software clause at DFARS sec. 252.227-7013.

           cisco Systems, Inc.
           170 West Tasman Drive
           San Jose, California 95134-1706